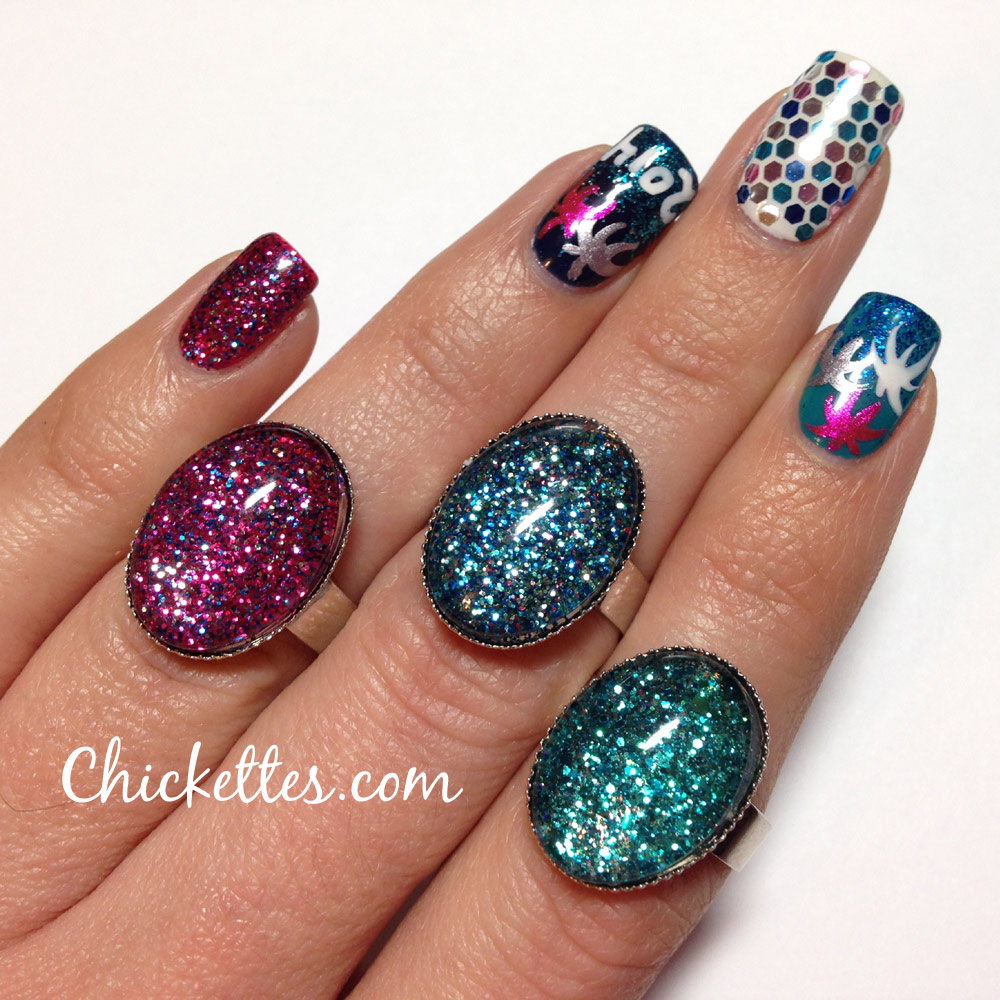
Image may be NSFW. Clik here to view.I’ve been having fun making glittery rings lately and I posted this picture of three rings that I made using the Gelish Trends polishes on FB and Instagram. I thought I’d do a video demonstration to show you how it’s done. As a quick side note, I’m still wearing my New Years mani… it’s been 6 days, that might be a record for me! LOL
I actually ended up making two videos. The first one shows you how to make a ring like the ones in the picture using a glittery gel polish. The second video shows you how to make a glittery ring using loose glitter instead. Both are stunning, and the techniques can also be used to make pendants, bracelets and earrings. I currently only have the ring-making supplies, but you’ll probably be seeing more photos of rings that match my manicures in the future.
A list of the supplies used in these videos can be found at the bottom of the post.
How to make rings using gel polish:
How to make rings using gel polish & loose glitter:
I’ve had this lone Entity 1 polish sitting on my shelf for a few months and I finally decided to give it a try. The shade is called Electric Runway, a gorgeous shimmery electric blue. You know I’m a sucker for blues! I was really pleasantly surprised by this polish. It applied so easily and wears really well. It was pretty opaque with two coats, but I applied three. The price of the Entity 1 polishes seems to range from $10-15 on Amazon.com, though most are in the lower end of the range which is reasonable and comparable to other brands like Gelish. I might have to pick up a few more of these beauties.
I wore the plain color for a couple of days and then spiced it up with some embellishments. I stamped a design onto the nails using Bundle Monster plate BM-422 from the CYO collection, and China Glaze Passion. I took a dotting tool and added some tiny dots around the circles using Gelish Rendezvous and It’s a Lily. Then I applied a fuchsia gemstone in the center of each circle using Gelish Foundation as the glue, and added a layer of top coat over it all.
I’ve been a little under the weather with a head cold the last few days. My head is so foggy that I can’t even come up with a creative name for this manicure. LOL I started with one coat of Gelish Rendezvous, and then applied a gradient at the base of the nails using Oocha Coocha. I applied a coat of Izzy Wizzy over the whole nail and then used a dry brush to burnish my CND Cerulean Blue Additive into the tacky layer to create a better blue gradient effect. You can still kind of see some of the glittery shimmer from Oocha Coocha poking out from behind.
Image may be NSFW. Clik here to view.I thought it might be fun to stamp a design over the gradient, so I added this tribal-ish chevron pattern onto each nail using Messy Mansion plate MM12 and Konad Black polish. The end result is a little dark and you can’t see as much of the cranberry color. I almost wish I hadn’t applied the stamp because the gradient alone was so pretty. What do you think? Hmm… I also just noticed that this mani uses almost the same color scheme as my last one. I guess my creative juices just aren’t flowing at the moment… hopefully I’ll feel like myself again very soon.
I bought a few more Gelish Trends polishes and this one is A Pinch of Pepper, a black and white glitter topper in a clear base. I thought I would show what it looks like over black, white and a color. The pink color that you see here is Gelish Carnival Hangover… which has completely changed colors on me. I used to be a more purple shade, but is now a very bright pink… that’s the first time I’ve had that happen. See what it used to look like here.
A Pinch of Pepper is a fun glitter topper that can be used over any color. Obviously if you wear it over white or black, you can’t see the glitter that matches the base color. I applied two coats of a Pinch of Pepper on each nail. Do you like it?
Messy Mansion sent me a few of their stamping plates to try and review. They have some really unique stamping designs, so be sure to visit their website to check them out. And even though the company is located in Australia, the shipping rates to the states are very reasonable and they got here really fast! The round Messy Mansion plates are 7mm round, so they are larger than most standard round plates. They don’t fit in the storage binder that I have, but the upside to the larger plates is that they seem to fit more designs on a plate and the impressions are larger (18mm x 24mm) so they work very well for wider and/or longer nails.
I had a lot of fun creating this Fire & Ice design using plate MM27. The designs on this particular plate are very fluid and I think would work well on any size nail. The impressions were very high quality and the images picked up and transferred flawlessly. For the fire nails I applied one coat of Gelish Backstage Beauty and then added a gold glitter gradient into the tacky layer using my Glam & Glits Sparkling Gold pigment powder. I applied one coat of my Gelish TIO, cured and wiped, and then applied the fire stamp using the MM27 plate and Konad Black polish.
For the ice nails, I applied one coat of Gelish My Favorite Accessory and then created a gradient effect using two different CND pigment powders, Blue Heaven & Deep Blue. I applied my Gelish TIO over top of the gradient, cured & wiped, and then stamped the ice pattern on using the MM27 plate and Konad white polish. Watch my stamping video to learn more about how to stamp over gel polish.
I’m very impressed with the Messy Mansion plates that I’ve tried so far. You can see all of the designs that I’ve done with their plates here. I will be creating a few more designs using the other plates in the coming weeks so stay tuned!
This is Concrete Couture, another glitter topper from the Gelish Trends line. I applied three coats of this without a base color, though I would probably recommend applying only one or two coats over a base color (black would look great). Concrete Couture has a sheer black base and is loaded with grey glitter in all different sizes. It goes on a little thick and would require at least 3 coats for full opacity on it’s own. You can still see the tips of my nails a little. This polish also had a little stronger smell to it than most. It’s definitely a cool glitter topper though it looks more like asphalt than concrete to me. Another quick thing to note is that these Trends polishes all require some extra time to remove if you apply multiple layers, they’re super strong and durable.
Valentine’s Day is coming up and I’m in the mood to start doing some love themed nail art (even though I’m currently single)! Last year I did an “owl love” theme and I had to do it again this year using some different water decals. These cute owl decals are from LuckyStarStyle and the decal sheet comes with three designs on it – an owl on a branch, an owl by itself and two hearts. The decals from this company work pretty well with gel polish compared to others that I’ve tried. I used scissors to cut the design from the sheet, dropped it in water for just a few seconds and then rubbed the pattern between my index finger and thumb and the paper backing came right off. I used some tweezers to pick up the decal and place it onto my nail, and then used my finger to press it down and rub out any air bubbles. After letting it dry for a minute or two, I applied my top coat over the whole nail and cured. Decals last the longest when you can get a layer of top coat over and around the entire decal, so I suggest leaving a little space on the edges of your nails otherwise the decal may lift from the edges.
My index finger and pinky have one coat of Gelish All Dahlia-ed Up and two coats of the Gelish Trends topper Too Tough to be Sweet. My middle finger and thumb have two coats of Gelish Artic Freeze, the brightest white in the Gelish line. And my ring finger has three coats of Shellac Strawberry Smoothie (which only cures in a UV lamp). The word “love” was stamped onto my thumb using Bundle Monster holiday plate BM-H16 and Kleancolor Metallic Pink polish. These Kleancolor metallic polishes work great for stamping!
I created another nail design using the Messy Mansion stamping plates that I received. This one was created with plate MM06, which is one of their round plates with some gorgeous French patterns. This plate has three full nail patterns and 14 smaller ones including a poodle, chandelier, ribbons, and some fleur de lis patterns.
This was a bit coincidental, but the white that I used as the base color for three of the nails was Couture Ooh La La French. The two silvery metallic nails are painted with Couture High Maintenance. I added a yellow gradient to my index and middle fingers using a yellow CND additive powder, and then stamped them both with a chandelier pattern from this plate using China Glaze Awaken. I stamped my ring finger with a large floral pattern and Kleancolor Metallic Sapphire. And I stamped my pinky and thumb with one of the fleur de lis images and Konad black polish.
I had a little difficulty stamping the striped patterns onto my nails. My intention was to use one of the striped patterns on my middle finger, but after several attempts I couldn’t quite get the stamp to apply perfectly straight. That’s not a reflection on the plate itself, but rather my stamping skills and my personal anal retentive qualities. LOL
I’m really loving these Messy Mansion plates and can’t wait to try some more designs with them!
I’ve been ogling over the new limited edition LeChat “Love Obsession” collection and had to buy it. I actually bought two and am holding a giveaway of this set… click here to enter the giveaway. This collection literally just arrived in my mailbox and within a couple of hours I had already created this awesome nail art with it. Can I just say that I LOVE these colors!? The two colors in the collection are Seduction (glittery fuschia) and Obsession (glittery black). This collection actually comes with 4 bottles of matching RNP, two full size and two mini size… a really great deal. If you want to buy this collection, I found it for sale on TransDesign.com for $32.
Both colors have awesome coverage and were so easy to apply and work with. Obsession was almost opaque in just one coat and was so perfect for doing nail art with. This design just sort of came to me as I sat down with the colors. I did it all freehand, no stencils or tape. The hearts were drawn on with a dotting tool and I just used the brushes to pain on the other stripes. The heart studs are from the Born Pretty Store.
Image may be NSFW. Clik here to view.I saw this polish kit on LeChat’s Facebook page and HAD TO HAVE IT!!! So I bought one for me, and one to share with one of you! This kit comes with two colors, Seduction & Obsession and it comes with 2 bottles of soak-off gel polish, two full size bottles of matching Dare to Wear regular nail polish AND two mini bottles of the regular nail polish. There will actually be two winners for this giveaway because I’m going to award a second prize of the minis since I don’t need mine.
Below are swatches of the two colors included in this set. They are both gorgeous glittery colors and the RNP matches the gel polish so perfectly!
Image may be NSFW. Clik here to view.Here’s a picture of the MINI kit that will be given to the second place winner. And you can see the awesome nail art that I created with this collection. Image may be NSFW. Clik here to view.
First Prize: 1 LeChat Perfect Match limited edition “Love Obsession” Gel Polish Kit (includes 2 soak-off gel polishes, 2 full size and 2 mini matching regular nail polishes)
Second Prize: 1 LeChat (Dare to Wear) “Love Obsession” MINI set (regular nail polish, not gel)
The Rules:
The giveaway will run through February 7, 2014.
Entries will be collected via Rafflecopter only.
The winner will be selected randomly via Rafflecopter and announced on February 8th.
The winner will be notified via email, and will have 48 hours to claim the prize or a new winner will be selected.
Who’s ready for some more Gelish Trends swatches? I have two for you today and will have a few more coming soon. This first one is called Let Me Top You Off. It’s a topper with red, blue and purple glitter. I applied two coats of this on each nail. My index and pink fingers don’t have a base color, the middle finger has a base of Artic Freeze, and the ring finger has Black Shadow. Initially I didn’t notice the purple glitter until I applied it over the black base, then the color really popped out at me. I didn’t think I would like this over black, but that ended up being my favorite of the three looks. I think this would also look great over a dark purple or blue. It’s very festive and fun!
Image may be NSFW. Clik here to view.This next one is called Rough Around the Edges. I applied two coats of it over a plain nail, Artic Freeze, Black Shadow and Seafoam. I honestly don’t know if I can say anything nice about this polish. I didn’t like the consistency, it’s goopy and sticky and felt like I was applying oatmeal to my nails. And it’s definitely rough… even after applying a top coat my nails had a lumpy, bumpy texture to them. I like some textured polishes, but this didn’t do it for me. The iridescent flakies in this polish would be really pretty if they laid flat nicely. I heard that Fingerpaints is coming out with some flakie toppers in February, so I may have to try one or two of those to see how they compare. What do you think… would you wear this? I definitely won’t be wearing it again.
I’m working my way through these Trends. The two that I have for you today are dense glitter toppers similar to Party Girl Problems & Getting Gritty With It (see those swatches here). The first one is Sweet 16 which is a multi-colored glitter topper, but the dominant color is light pink. I also see some blue and silver glitter in there, and there may be other colors as well. This is three coats of Sweet 16 with no base color underneath. I really love these dense glitter toppers! My lightbox washes out a bit of the sparkle and makes them look a bit matte, but I can tell you that these definitely sparkle and shine in the light!
This is Girls’ Night Out. It’s also multi-colored but silver is the dominant color. I also see some specks of blue and red throughout. I really wish I could show you in pictures how truly sparkly it is. Soooo gorgeous! Again, this is three coats of the glitter topper with no base color underneath.
I just picked up a few limited edition Gelish colors that I want to share with you. I’m getting ready to leave for a ski vacation in Park City, Utah (yay!), so I don’t have time to prepare full swatches at the moment, but I wanted to at least show you what these colors look like on swatch sticks. This will be my last post before I leave, but I have several new posts planned while I’m gone including guest posts from Michelle at Manic Talons & Kim at Ten Little Canvases.
January 31st kicks off the Year of the Horse, and Gelish put out this collection to commemorate the Chinese New Year. This is a limited edition set that comes with two Gelish gel polishes and two Morgan Taylor regular nail lacquers. Gelish Kick Off the New Year is an A-MAZING holographic glitter polish! It has holographic micro glitter, hex glitter and bar glitter. It may be the most sparkly Gelish polish yet. I think this will be what I end up wearing for my vacation mani. Gelish Red-Y For the Festival is a bright red cream with awesome coverage. And the two Morgan Taylor colors are Good Luck Charm, a gold glitter polish and Pretty Woman, a bright red that matches the Gelish red in this set.
Here are comparisons of Red-Y For the Festival next to some of the other Gelish bright reds. To be honest, it’s pretty hard to tell most of them apart. The four bright, creamy reds all look the same to me. Red-y For The Festival did seem to have the best coverage with just two coats though.
Image may be NSFW. Clik here to view.So… I posted the 2013 Gelish Winter Reds about a month ago. Someone pointed out to me that the official Gelish website actually had two more colors listed than what was shown in the collection photo. Those colors were With His Red So Bright and Dancer, Prancer, Cranberry Vixen. I looked and looked and FINALLY found them for sale last week and snatched them up quickly. I’m not sure if these are limited edition colors or if they will become a part of their regular line, but they are listed on the list of Gelish colors on their site so they may be here to stay.
Image may be NSFW. Clik here to view.And this is a comparison of Dancer, Prancer, Cranberry Vixen next to some other colors. I put it against purples and shades of cranberry/burgundy so that you can see how it compares. I think it looks identical to All About Me. This makes me wonder… did something get mixed up, or is this actually the color? Hmm… strange.
Hi everyone! I’m Michelle from www.manictalons.com. When Andrea invited me to write this post, I may have squealed just a little. Or a lot. Ok, it was a lot. I spent the next few days trying to decide what I could possibly show you that Andrea hasn’t already covered. Then it hit me. I am a glitter fanatic. I have over 200 different loose glitters in my stash, so it only makes sense to show you something with glitter.
Image may be NSFW. Clik here to view.
I recently posted a video tutorial on my blog showing how I manipulated loose glitter to create a glitter ruffian manicure. I used that same technique to create this Key to My Heart design. After applying and curing my base of Couture Dance til Dawn, I removed the tacky layer and used a thin nail art brush to sketch the key with Couture Gilded and the heart with Couture Red Carpet. Once I was happy with the sketch, I cured again to lock the design in place.
Image may be NSFW. Clik here to view.
I then poured a small amount of ArtsyFartsy Crafts Ultrafine Dark Gold Holographic glitter into a paint pallet and added a few drops of top coat (image 1). When mixed together, it should take on a thick, globby consistency (image 2). Using a thin nail art brush, I lightly spread the glitter mixture over the design, gently tapping it into place so that it didn’t appear too thick on the nail but covered the sketch of the key (images 3 and 4). I then took a stiff brush dipped in isoprophyl alcohol and gently pushed any stray glitter into place to straighten the lines (image 5). Once I was happy with the glitter placement (image 6), I cured for 30 seconds in my LED lamp to lock the glitter into place. I repeated this process with ArstyFartsy Crafts Ultrafine Red Holographic glitter for the heart.
Image may be NSFW. Clik here to view.
I hope you have enjoyed this design and tutorial. Loose glitter is one of my favorite additions to my gel polish stash, simply because it is so affordable and versatile. The possibilities using loose glitter are endless!
~Michelle
Hi everyone! I’ve been kicking off the Chinese New Year on a ski vacation in Park City, Utah. I wrote this post in advance… let’s hope that by today I didn’t break a leg or crash into a tree or something crazy. You’ll probably see periodic updates from me on FB and Instagram while I’m out. This is the mani that I settled on before I left. I wanted something relatively simple, but not too plain either.
I started with two coats of Gelish Artic Freeze on most nails with two coats of Kick Off the New Year over top. This is one of the new polishes that just came out in the Year of the Horse collection. It’s a glitter topper that’s packed with holographic hex and bar glitter. It has a bit of a gritty look to me, but has a gorgeous sparkle in the light. I really couldn’t capture the true feel of this in a photograph, so I had to also make a quick video (click here to watch the video).
The accent finger has three coats of Gelish Deep Sea and is stamped with MoYou London Festive Collection plate 06 and Konad white polish.
Update: This is the picture that I took a couple days ago with the Utah mountains in the background. If you follow me on Instagram or Facebook you may have already seen this. Image may be NSFW. Clik here to view.
In my absence, below is a guest post from Kim Baker of Ten Little Canvases. You all might remember that Kim also did a guest post for me last year. She now has a blog, so be sure to follow her!
Hello everyone! Andrea has invited me back for a guest post, so with Valentine’s Day coming up I thought I’d do video tutorial on how to do hand drawn gel polish hearts simply using 3 dots as a guide. I’ve added metal studs to outline the heart for extra pizazz but you can use caviar beads, small crystals or a glitter striper. Hope y’all find the video helpful!
Image may be NSFW. Clik here to view.Hi Everyone! I’m back from vacation and I have swatches of the new Gelish Once Upon a Dream Collection for you! I am really excited to see some pastels in the mix. Below are my swatches, each has three coats of color. The formula of the polishes was great and they applied with ease. I will report back in a couple of days with comparison photos and any fading reports.
This is My One Blue Love, a soft baby blue. This is definitely a unique color in the Gelish line, no other blues are anything like it. This is my personal favorite of the bunch, but you know I’m a total sucker for blues!
Image may be NSFW. Clik here to view.Image may be NSFW. Clik here to view.All Haile the Queen is a pinkish lilac shade. It’s more pink than I was anticipating. It’s similar to It’s a Lily, only lighter. I’m very afraid that this one may be a fader, so I’ll keep an eye on it for a couple of days. The color when it’s wet is more lilac than after it cures. You can see the color difference when applying additional coats.
Image may be NSFW. Clik here to view.Image may be NSFW. Clik here to view.Oh What a Knight! is a shimmery metallic color that I would call a pinkish bronze. I wasn’t sure that it worked well with my skin tone when I first applied it, but it grew on me. It’s definitely a unique color and the finish is really nice. Be careful when applying though because it could show some brush strokes.
I’ve received a lot of questions about whether any of the new Once Upon a Dream collection colors are faders and how they compare to existing Gelish shades, and I’m happy to report back to you today after a little testing. I applied all of the colors to swatch sticks and put them on a window sill for two days so that they would be exposed to natural sunlight (even though it’s been rather overcast here, they are still getting natural light). After one day, I did a quick test and reported on my FB page that I thought two of the colors were faders. Below is the picture that I took after applying a dab of fresh polish to the tips of the swatch sticks and curing.
Image may be NSFW. Clik here to view.I reported that it appears that All Haile the Queen fades to a lighter shade of pink and is less lilac, and that She’s My Beauty fades to a more brown-ish color though it’s very subtle. After two days I did another test on all of the swatches. This time I applied a fresh coat of color in a diagonal across the tips of all of the swatches, cured and then applied a top coat and cured again. Here is what these two colors looked like after this process… I have to say that I may need to retract my statement about She’s My Beauty because I no longer notice much of a color difference. If there is a difference, it’s VERY VERY subtle… though All Haile the Queen has definitely faded. This is only a two-day test, so there is a possibility of further fading after wear of one to two weeks.
Image may be NSFW. Clik here to view.The other colors all held up well and I didn’t notice any color differences at all. You can see the line where I applied the fresh coat, but as I move these swatches around in the light there is no color difference, just the texture bump where the new polish is applied. Again, this is only a two day test, but most gel polishes that fade will show a difference within this timeframe.
Image may be NSFW. Clik here to view.So onto the next question… how do the new colors compare with existing ones? I compared Fairest of Them All with Sweet Morning Dew & Tiger Blossom, and it’s right in the middle of the two. It’s a couple shades darker than Sweet Morning Dew and a shade or two lighter than Tiger Blossom and also a little more coral.
And I put She’s My Beauty next to Mauvy Mauve. These two are actually fairly close, but She’s My Beauty is a little more brown-ish. Also Mauvy Mauve is one of the colors that’s only available in mini size. I would have liked to also compare these with Exhale, but I no longer own that color and couldn’t find my swatch of it.
You can click on the image below to enlarge.
Image may be NSFW. Clik here to view.Here you can see that I put My One Blue Love next to Up in the Blue. My One Blue Love is the palest blue currently available in the Gelish line. Up in the Blue is a known fader and this swatch is old, so this is in it’s faded form.
I’m LOVING the new Gelish Once Upon a Dream collection and decided to try a mani with a combination of the colors. I started with two coats of Gelish Artic Freeze (my favorite white) as the base and then I used a fan brush to randomly stroke on each of the colors, curing after applying each. The only color from the collection that I didn’t use is She’s My Beauty. I applied a thin layer of top coat over the brushstrokes, cured and wiped the tacky layer and then stamped the word “LOVE” with Bundle Monster plate BM426 and Konad Black polish (and then top coated again).
I really like how this turned out, and it’s perfect for V-Day even though the colors may be a little non-traditional. My inspiration for this mani came from a brushstroke design that I saw recently on Madamluck’s IG page. Go check out her awesome nail art and get inspired too! Happy Valentine’s Day (a day early) everyone!! ♥♥♥
I have two quick swatches of some Gelish Trends glitter toppers. These two Trends are pretty much identical with different sized glitter and some holographic effects except one is silver and the other is gold. In the pictures below, I applied two coats of the toppers over different colored bases – clear, white, black & red, so that you can see how they can be used to spice up any mani.
 I’ve been having fun making glittery rings lately and I posted this picture of three rings that I made using the Gelish Trends polishes on FB and Instagram. I thought I’d do a video demonstration to show you how it’s done. As a quick side note, I’m still wearing my New Years mani… it’s been 6 days, that might be a record for me! LOL


